
Face recognition is an amazing technology that is starting to become more and more popular in our apps and cell phones, and now there’s a new python library that let’s us incorporate face recognition into our own python applications!

In this tutorial, I’m going to be teaching you some of the most common face-recognition functions and then provide code for one of my face recognition python programs.
First we need to install face-recognition:
To install the face-recognition library on your machine, you can use the following command in the terminal:
Here are some common lines you can use in your face recognition programs and what they do:
Obviously, this line is to import the library into your program

This line tells face-recognition which picture you want it to analyze.

This line returns a list of encodings face-recognition will use to detect faces. Of course if you saved the previous line in a variable, put the name of that variable in place of “face_recognition.load_image_file(“your_file.jpg”)”

This line is for comparing to faces and returns a boolean response. If it’s true, that means that the two pictures it’s comparing are of the same person. The third parameter, is of the tolerance. Depending on how high the tolerance is, the more closely face-recognition checks for those tiny details of the face. I found that 0.5 is the perfect tolerance for most pictures. Too much or too little tolerance will cause your program to break, so I would recommend to go with 0.5. If that doesn’t work, you can experiment with different tolerances.
If you want to see some sample face-recognition applications, visit my face-recognition repository at
https://github.com/alainaahuja/face_recognition
Flask on Apache
How to Deploy a Flask Application on Apache WebServer on Mac
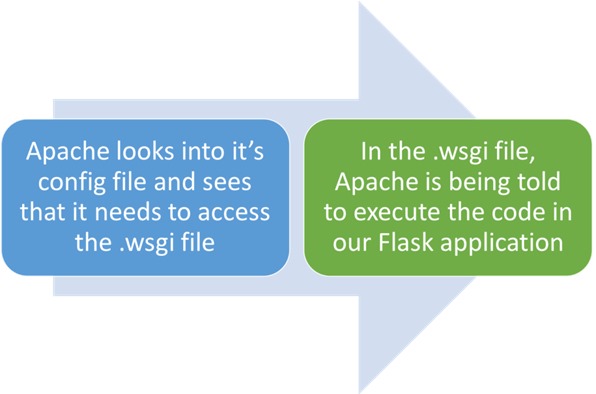
This article explains step by step how to deploy a Python Flask application on an Apache WebServer on Mac. The diagram below explains how the Apache server will work with our code
Install Flask:
Type this command into your terminal to install Flask on your machine:
Step 2:
Install mod_wsgi:
Type this command into your terminal to install mod_wsgi on your machine:
Step 3:
Create a Flask application:
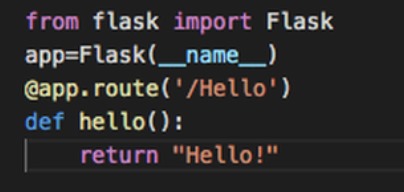
Create a .py file for your Flask application. Let’s name it “Hello_Flask.py” . We also need to make a folder for this file(I named mine “Alaina_code”). Now enter the following code into your .py file:
Step 4:
Create a WSGI file:

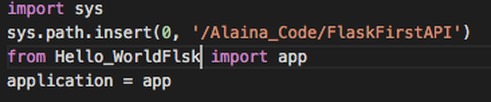
In order for the Apache server to understand the code we wrote in “Hello_Flask.py”, we need to make a .wsgi file. Let’s name it “Flsk_config.wsgi”. Put this file in the folder we made in the last step and enter in the following code into it:
Step 5:
Editing and working with httpd.conf:
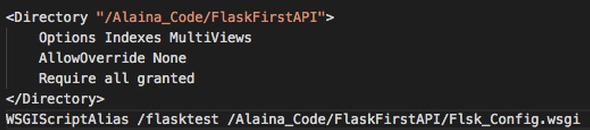
We finally need Apache to recognize the WSGI file we wrote. Apache’s config file(httpd.conf) should be available at this path:‘/etc/apache2’. Open it and enter in the following:

Now you should be able to run your program. To test it, type into the browser:
http://localhost/flasktest/Hello
You should be getting a message like this:
