We all know Alexa. The useful voice assistant that can do so many things, such as telling us the time and reminding us that our library books are due. This article will tell you how to create a simple Hello World voice skill for Alexa.
Step 1: Get an Amazon account
The first step to creating our Alexa skill is to log into the Alexa Developer Console and if you don’t already have an account, create one.
https://developer.amazon.com/alexa/console/ask?
Step 2: Create a new skill.
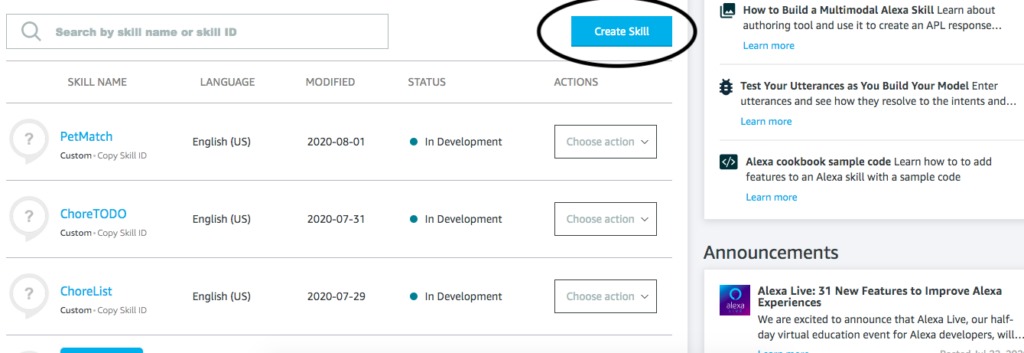
You should see a list of skills on this page once you’ve logged in, but assuming this is your first time making an Alexa Skill, you should not have any yet. Near the top of the page, you should see a button that says “Create Skill”:
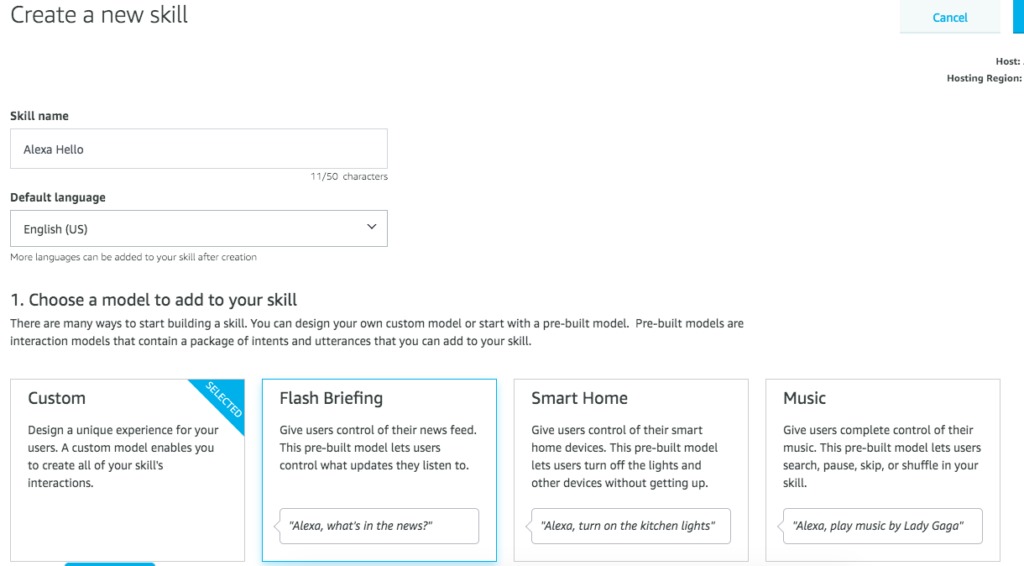
Once you click it, you should see a field to enter your skills name, your default language, The type of skill you want to create etc. For this Hello World skill, we’re going to name it “Alexa Hello”. Choose “Custom” for the skill’s model and since we’re going to be coding this skill in python, choose “Alexa-Hosted(Python)”:
Click “Create Skill at the top of the page. This should take you to choose which template you want for your skill. Since we’re not doing anything too fancy here, we’re just going to stick with “Hello World Skill”:

Finally, click “Continue with Template” at the top of the page and wait for the developer console to create your skill.
Step 3: Understanding Invocations, Intents, and Slots
After everything has loaded, you should see a page with a side panel that looks like this:
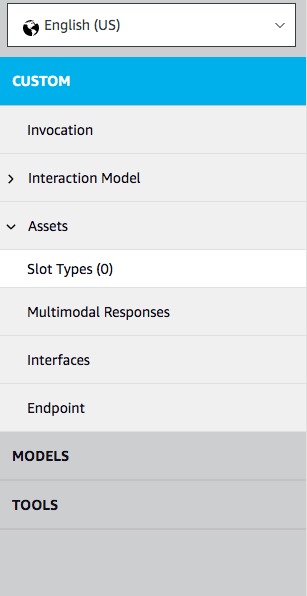
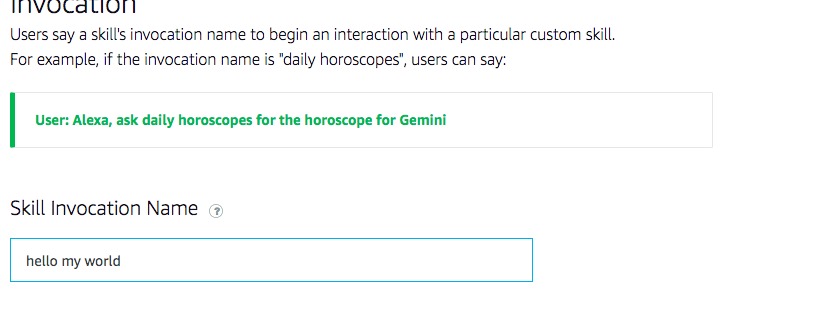
The first tab called “Invocation” when clicked on offers you a block to enter in your skills invocation name. The invocation name is the phrase your user says to start your skill.
If you expand “Interaction Model”, you’ll see a number of new tabs, but the one we’re going to focus on in this tutorial is the Intents.
Intents are classes that are each responsible for doing a specific task in the Alexa Skill. Your skill should have come with 4 built in Amazon Intents as well as a HelloWorldIntent. Later, we’ll create a new custom intent to tell the user a message.
The last feature we need to talk about are slots. Slots act like variables in an Alexa Skill. For example, if you were to make a skill to order a pizza, The user could say “I want a large plain cheese pizza” but in the intents you could define this sentence using slots for the size and topping: “I want a {size} {topping} pizza”.
Step 4: Defining in the UI
Now we’re going to start defining our invocation name and intents. First go into the “Invocation” tab and enter “hello my name” as the skill invocation name.
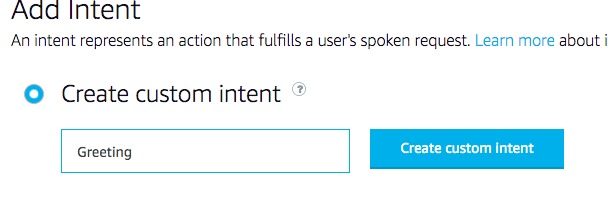
Next we’re going to create our own custom intent. Click the Intents tab on the side panel and click on “Add Intent”. Let’s name this intent “Greeting”.
Then you should see a space for Sample Utterances. Sample utterances are phrases the user might say to invoke the intent. For example, If you have the skill to order the pizza, and you have a PizzaOrder intent, one of the sample utterances could be “Order a pizza” and so that will tell the skill that the user wants to order a pizza so it will find the intent that will be able to complete the task.
Our skill will say hello to the user, so the user will invoke the intent by telling Alexa hello. Add the following utterances:

Now that everything is defined, for all these changes to take place, we need to build the model. Click “Build Model” at the near top of the screen and once the build is successful, you’re done building the UI part of the skill!
Step 5: Write the code
Now the build is successful, click on the tab that says code at the top of your screen. A file named ‘lambda_function.py’ should be open. And here is where you will do all the backend code for your intent. Create a new class for your intent and enter in the following code:

Scroll to the bottom of the file and add this line:
Finally press the “Deploy” button at the top of the screen and move on to the test tab(also at the top of the screen)
Step 6: Testing
Now we’re in the test tab. Just in case you don’t have an Alexa device at home, you can still create these skills, because the developer console has a built-in Alexa stimulator. To enable it, expand the drop down menu that is now set to “off” and choose development.
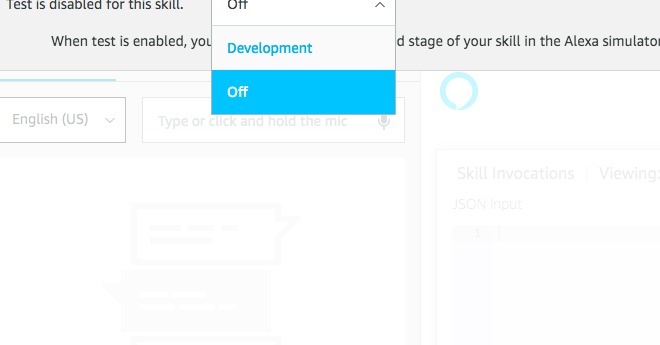
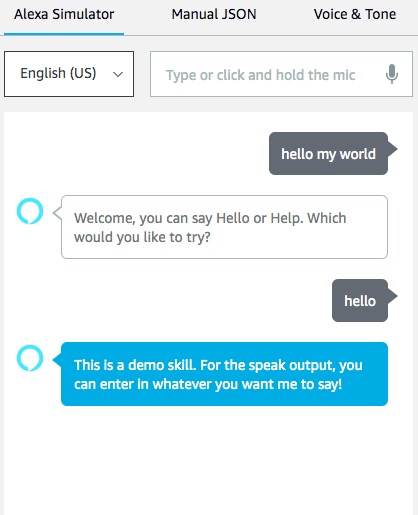
Now we can use our skill as if we are users. Start the skill with your invocation name, and then invoke your intent by saying hello:
